sourdough starter
I remember cold November mornings at my Grandma's house smelling the delicious scents of pancakes and eggs for breakfast. My Grandpa would be in the living room with the news paper and a fire in the fireplace. Those sourdough pancakes were so wonderful topped with a little bit of butter and maple syrup - they literally would melt in your mouth.
I also remember coming home after school during the winter months and smelling fresh baked bread the minute I walked in the door. Sure enough, coming around the corner, I'd see Mom turning out a fresh loaf of sourdough bread onto a wire rack.
Both of these memories are so fond to me and over Christmas I received a fantastic gift from Mom! She gave me a glass jar to make my own sourdough starter in (it's just like the one she has). I've been pretty busy since I got back from my Christmas vacation but, this last week, I got around to making my very first starter. I'll give you the details below and you will be well on your way to creating your own delicious memories.
 What you need...
3 packages of yeast
1 and 1/8 cup warm water (between 120-130 degrees)*
1 Tbsp. sugar
2 and 1/2 cups unbleached, all-purpose flour (white)
Non-metal container (preferably glass or crockery that does not have an air tight seal)
Pie pan (just in case)
*Yeast is a tricky little thing. It's very particular and prefers a certain temperature in order to work properly. Check out this website for a little extra reading about yeast and temp's but, for the starter I'd suggest using a thermometer to check the temp of your water. I start with warm water, check the temp, then heat the water in the microwave until it's in between 120 and 130 degrees. Depending on the starting temp of your water it usually takes 20 - 40 seconds to get it just right (again, use a thermometer to get the right reading).
 First...
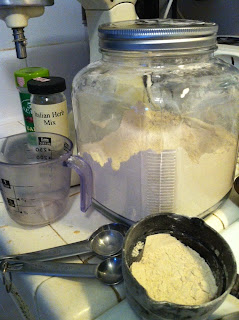
In the container that you've chosen, take the three packages of yeast and dissolve them in the warm water. I like to use a wooden mixing spoon - metal can react with yeast - to stir it around and get it nice and dissolved.
Next...
Add your sugar to the mixture and stir it around. The mixture will start to bubble and, once that happens slowly add flower until what you have at the bottom of your jar is a smooth paste (it may not take all of the flour).
Then...
Cover loosely and set in a warm place. For me, this meant putting it in the water heater closet.
*Note: place the pie pan underneath the container just in case the starter grows so big it overflows your container...it's been known to happen :/
The next day...
 Stir your starter each day for the next 2-3 days. It will 'grow' and bubble and smell sour - this is OK!! In fact, this is exactly what you want. If you find that there is a crust on the top of your starter make sure to stir that back into the mixture as well. If it's over the entire mixture (still ok) think about covering it with plastic wrap - maybe your lid is a little too loose?).
Finally...
Once your starter has worked for a few days you have some options.
Option 1:
If you decide to let your starter sit out, find a cool and dark area for it to make its home in. Once it's been comfortably settled in, make sure to feed it by stirring in 1 cup of flour and 3/4 cup water each day. After it has grown a few weeks and reached full strength, you only need to feed it once a week to keep it healthy.
*Note: The starter will get pretty big if you're feeding it every day and you may need to either use it or split it off into another container. This could be a great gift idea - take a few cups of your starter and give it to a friend!
Option 2:
Once your started has grown for 2-3 days you can store it in the refrigerator. On a note from Mom, she suggests warming it up on the counter and feeding every other week (it has to know that you love it of course).
The same thought goes for when you want to make something with it. I'd suggest taking out your starter the night before, letting it warm up, feeding it, and then using it in the next day in your recipe. After you've depleted it, let it sit out for a few days, feeding and stirring it so it can gain back its strength.
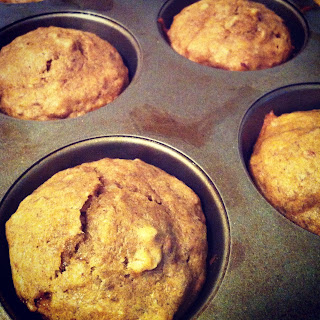
There are so many wonderful recipes you can use your starter for including my sourdough pancake recipe. I'll be adding a sourdough bread recipe soon as well. Just don't forget to love your starter and take care of it. It can't survive on its own ;)
I also remember coming home after school during the winter months and smelling fresh baked bread the minute I walked in the door. Sure enough, coming around the corner, I'd see Mom turning out a fresh loaf of sourdough bread onto a wire rack.
Both of these memories are so fond to me and over Christmas I received a fantastic gift from Mom! She gave me a glass jar to make my own sourdough starter in (it's just like the one she has). I've been pretty busy since I got back from my Christmas vacation but, this last week, I got around to making my very first starter. I'll give you the details below and you will be well on your way to creating your own delicious memories.
What you need...3 packages of yeast
1 and 1/8 cup warm water (between 120-130 degrees)*
1 Tbsp. sugar
2 and 1/2 cups unbleached, all-purpose flour (white)
Non-metal container (preferably glass or crockery that does not have an air tight seal)
Pie pan (just in case)
*Yeast is a tricky little thing. It's very particular and prefers a certain temperature in order to work properly. Check out this website for a little extra reading about yeast and temp's but, for the starter I'd suggest using a thermometer to check the temp of your water. I start with warm water, check the temp, then heat the water in the microwave until it's in between 120 and 130 degrees. Depending on the starting temp of your water it usually takes 20 - 40 seconds to get it just right (again, use a thermometer to get the right reading).
First...In the container that you've chosen, take the three packages of yeast and dissolve them in the warm water. I like to use a wooden mixing spoon - metal can react with yeast - to stir it around and get it nice and dissolved.
Next...
Add your sugar to the mixture and stir it around. The mixture will start to bubble and, once that happens slowly add flower until what you have at the bottom of your jar is a smooth paste (it may not take all of the flour).
Then...
Cover loosely and set in a warm place. For me, this meant putting it in the water heater closet.
*Note: place the pie pan underneath the container just in case the starter grows so big it overflows your container...it's been known to happen :/
The next day...
Stir your starter each day for the next 2-3 days. It will 'grow' and bubble and smell sour - this is OK!! In fact, this is exactly what you want. If you find that there is a crust on the top of your starter make sure to stir that back into the mixture as well. If it's over the entire mixture (still ok) think about covering it with plastic wrap - maybe your lid is a little too loose?).Finally...
Once your starter has worked for a few days you have some options.
Option 1:
If you decide to let your starter sit out, find a cool and dark area for it to make its home in. Once it's been comfortably settled in, make sure to feed it by stirring in 1 cup of flour and 3/4 cup water each day. After it has grown a few weeks and reached full strength, you only need to feed it once a week to keep it healthy.
*Note: The starter will get pretty big if you're feeding it every day and you may need to either use it or split it off into another container. This could be a great gift idea - take a few cups of your starter and give it to a friend!
Option 2:
Once your started has grown for 2-3 days you can store it in the refrigerator. On a note from Mom, she suggests warming it up on the counter and feeding every other week (it has to know that you love it of course).
The same thought goes for when you want to make something with it. I'd suggest taking out your starter the night before, letting it warm up, feeding it, and then using it in the next day in your recipe. After you've depleted it, let it sit out for a few days, feeding and stirring it so it can gain back its strength.
There are so many wonderful recipes you can use your starter for including my sourdough pancake recipe. I'll be adding a sourdough bread recipe soon as well. Just don't forget to love your starter and take care of it. It can't survive on its own ;)
Aw, thanks for the kind words! So glad you like to bake too! I'm making some more bread tomorrow from the bread cookbook you gave Dad for Christmas. Great blog! --Love, Mom
ReplyDelete