garlic & herb whole wheat pizza dough
I love pizza. There is just something about fresh bread, tangy tomato sauce, and hot melted cheese that cry out to me and cause me to eat way too much in once sitting *guilty face*. Because of this love for pizza which I think I got from my Dad, I thought I'd share my recipe for a pizza crust that will not only support that beautiful tomato and cheese combo but will also add flavor to the pizza itself! My Mom always makes homemade pizza with the best whole wheat crust and this is my variation.
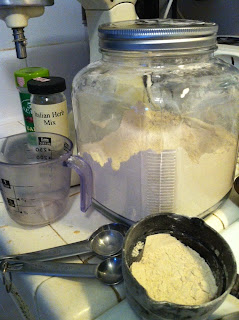 What you need...
1 1/4 C. whole wheat flour
1 packet dry yeast
1 C. warm water (temp between 120° - 130°)
2 Tbsp. olive oil
1/2 tsp. garlic salt
2 tsp. Italian Herbs
1 to 2 more cups flour
First...
[Using a stand up mixer]
Put first portion of flour and yeast in your mixer. Add the cup of warm water (make sure you keep the temp between 120° - 130° in order to activate the yeast and not kill it) and the olive oil to the mixture and turn the mixer on low for about 30 seconds.
Scrape the sides of the bowl with a spatula and then mix again for roughly 3 minutes.
 Next...
After the 3 minutes are up, add in the garlic salt and Italian herbs and mix slightly then, exchanging the flat beater for the dough hook (yes, I will admit to looking up the proper terms for those because I couldn't think of what to call them) slowly add in more of the flour taking time for it to become completely incorporated before adding more.
Then...
When the dough sticks to the hook and is no longer sticking to the sides slide it off and onto a lightly floured surface to kneed it. This is my favorite part! Since the dough will probably be slightly sticky add more flour over the top and gently kneed it just a few times until it is touchable and yet still elastic. You don't want the dough to become too stiff.
Once it's to this point, round it out and leave it on the board in a warm spot (I keep mine on top of my oven since it's on getting heated to bake the pizza) and drape a thin dish towel over the top to let it rest/rise for 10-15 minutes.
 Finally...
Once it's rested, stretch it out! This is your opportunity to pretend that you work in a pizza parlor. You can use both fists to stretch it out, twirling at your own risk.
 I don't have a pizza pan (yet) so right now I use a rectangle baking sheet and spread my dough out on it - generally using my fingers to stretch it to the sides in a very unattractive fashion but I just claim it adds character.
 For the Pizza...
Turn on your oven to 375°
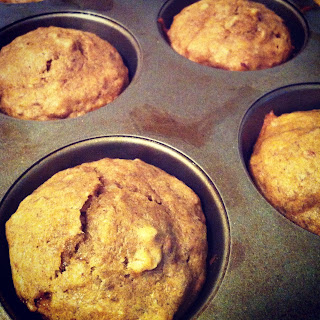
Once the above steps are complete, take the crust that you've just made and bake it for 15 minutes.
I like to rub a little olive oil on the crust before I bake it. This is a great opportunity to use garlic olive oil too (just to add insult to injury).
After the 15 min. pull it out and top with sauce, cheese, and any toppings you like to use.
For me that looks like marina, mozzarella cheese, pepperoni, and black olives all from my favorite local Sprouts Farmers Market . Once your pizza's topped, stick it back in the oven and give it another 15-20 minutes. The crust will definitely be done by then, but judge "done-ness" by your toppings. If the cheese is melted and bubbling and everything else looks nice and cooked - it's done!
 **A side note for draining liquids from canned goods such as olives.
Use a hand opener and open the can half way then pour out the liquid contents. This way nothing will come out but you've effectively drained all liquid.


1 1/4 C. whole wheat flour
1 packet dry yeast
1 C. warm water (temp between 120° - 130°)
2 Tbsp. olive oil
1/2 tsp. garlic salt
2 tsp. Italian Herbs
1 to 2 more cups flour
First...
[Using a stand up mixer]
Put first portion of flour and yeast in your mixer. Add the cup of warm water (make sure you keep the temp between 120° - 130° in order to activate the yeast and not kill it) and the olive oil to the mixture and turn the mixer on low for about 30 seconds.
Scrape the sides of the bowl with a spatula and then mix again for roughly 3 minutes.
 Next...
After the 3 minutes are up, add in the garlic salt and Italian herbs and mix slightly then, exchanging the flat beater for the dough hook (yes, I will admit to looking up the proper terms for those because I couldn't think of what to call them) slowly add in more of the flour taking time for it to become completely incorporated before adding more.
Then...
When the dough sticks to the hook and is no longer sticking to the sides slide it off and onto a lightly floured surface to kneed it. This is my favorite part! Since the dough will probably be slightly sticky add more flour over the top and gently kneed it just a few times until it is touchable and yet still elastic. You don't want the dough to become too stiff.
Once it's to this point, round it out and leave it on the board in a warm spot (I keep mine on top of my oven since it's on getting heated to bake the pizza) and drape a thin dish towel over the top to let it rest/rise for 10-15 minutes.
 Finally...
Once it's rested, stretch it out! This is your opportunity to pretend that you work in a pizza parlor. You can use both fists to stretch it out, twirling at your own risk.
 I don't have a pizza pan (yet) so right now I use a rectangle baking sheet and spread my dough out on it - generally using my fingers to stretch it to the sides in a very unattractive fashion but I just claim it adds character.
 For the Pizza...
Turn on your oven to 375°
Once the above steps are complete, take the crust that you've just made and bake it for 15 minutes.
I like to rub a little olive oil on the crust before I bake it. This is a great opportunity to use garlic olive oil too (just to add insult to injury).
After the 15 min. pull it out and top with sauce, cheese, and any toppings you like to use.
For me that looks like marina, mozzarella cheese, pepperoni, and black olives all from my favorite local Sprouts Farmers Market . Once your pizza's topped, stick it back in the oven and give it another 15-20 minutes. The crust will definitely be done by then, but judge "done-ness" by your toppings. If the cheese is melted and bubbling and everything else looks nice and cooked - it's done!
 **A side note for draining liquids from canned goods such as olives.
Use a hand opener and open the can half way then pour out the liquid contents. This way nothing will come out but you've effectively drained all liquid.
I've taken you through my normal pizza-making routine! Hope you've enjoyed the journey and I know you'll enjoy the results.

This looks like a great tasting pizza dough recipe, can it be prepared in advance or the day before and refrigerated to use the following day? Just wondering as I am a working mom/wife and time is short after work is over, so having it pre-mixed would be ideal.
ReplyDeleteThank you,
pizza loving mom :)
Thanks for the comment Laurie and welcome to the blog! The beauty of this recipe is that it doesn't take very long to make - no waiting for it to rise 1-2 hours. But, with that said, I can understand how difficult it could be the day of sometimes. I'd say, like with most yeast doughs, you can make it the day before.
DeleteMake it up to the "Then..." section and then place the dough in a lightly oiled bowl (like with cooking spray) making sure to cover the bowl tightly with plastic wrap. At this point you can place it in the refrigerator. It will continue to rise but very slowly because of the cold.
The next day I'd suggest taking it out about 30 min before you need to use it to allow it to heat up and rise a little bit before stretching it out for the pizza. Depending on how much it did rise in the fridge you could "punch it down" but I doubt it would get that big. It would last probably two days in the fridge before but I wouldn't go much further than that.
I hope this helps :)